Creating Stitch Brushes
It’s easy to customize brushes to produce repeating patterns in Sketchbook.
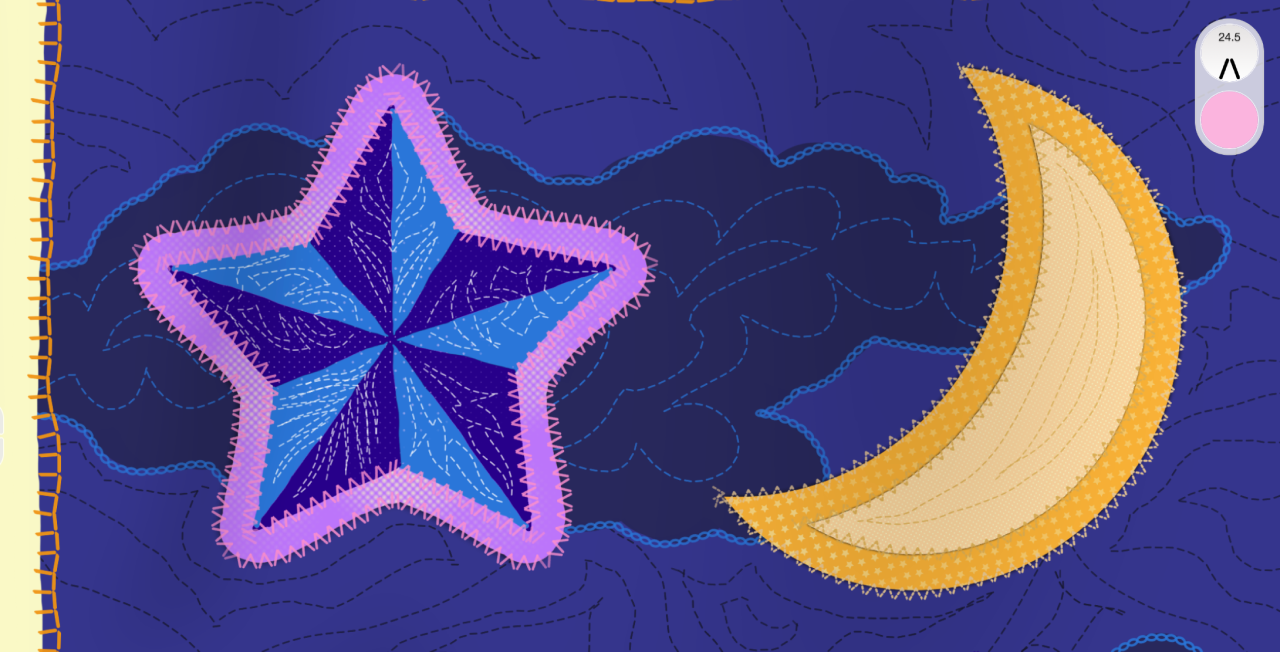
Stitching is a perfect example of repeating patterns because of the wide variety of stitches that are used for both practical and decorative purposes. But you can also apply this same thinking to braids, chains, or other patterns you might use regularly in your art.
Start by experimenting with almost any brush in Sketchbook’s Brush Library by simply increasing the spacing. This allows you to see the individual stamps.
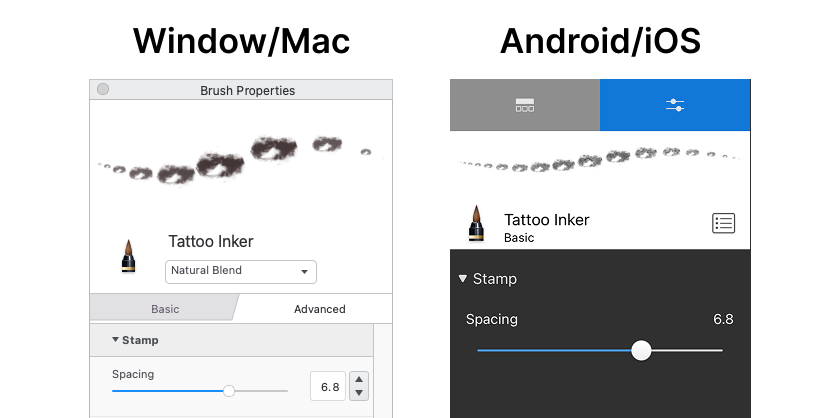
Adjust the Stamp > Spacing slider to set the gap you want between stamps.
Note that when you increase the brush size, the spacing stays relative, maintaining the appearance.
Using shapes
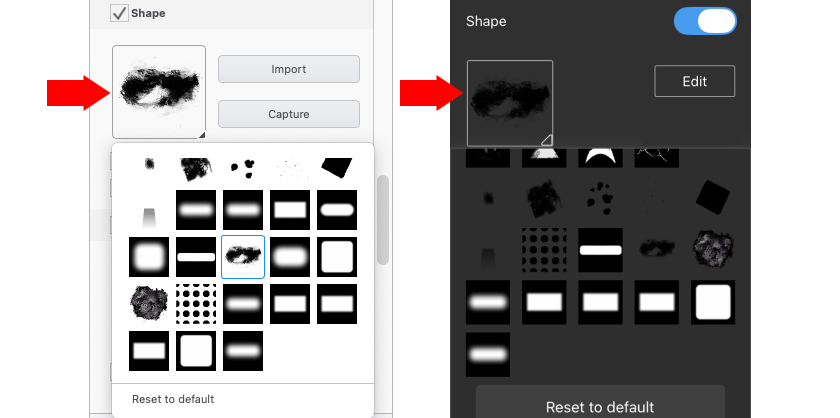
Now to make a brush that looks like an actual stitch, you will want to customize the Nib > Shape.
Sketchbook comes with 108 default shapes to choose from. With Shapes toggled on in brush settings, tap on the shape preview to open the shape selection pop-up.
Pick a shape the resembles an individual straight stitch.
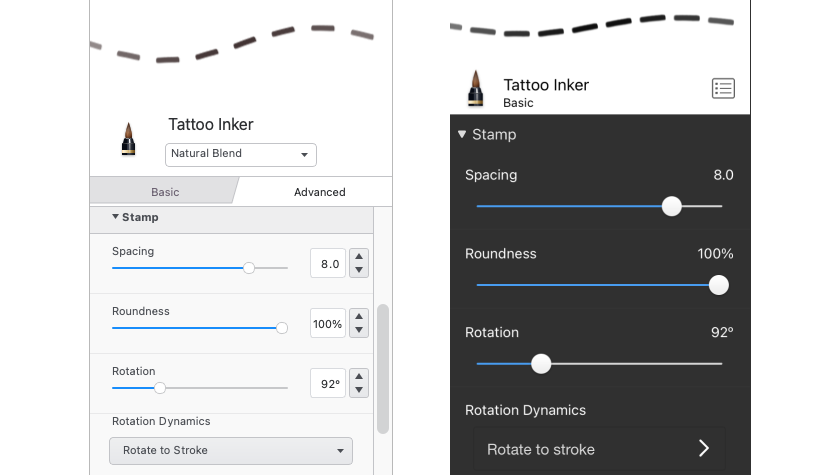
Adjust the Stamp > Spacing to set the gap between stitches.
If the stitch is not in the correct orientation, adjust Stamp > Rotation to give you the designed angle.
To have the stitching follow the direction of your brush stroke, change the Stamp > Rotation Dynamics to Rotate to Stroke.
Once you have the basic look of your stitch, you can explore more customizations with other settings.
Try a smaller light pressure size to let you imply perspective.
Adjust the opacity to increase or decrease visibility.
Turn on Nib Texture to add some grain to the stitch.
Try a little Randomness in size, spacing and rotation to give more character.
Making your own custom shapes
In Sketchbook Pro, or with the Premium Bundle unlocked on iOS and Android, you can import your own custom image to use as a brush shape.

Follow these tips to create a usable shape image:
The imported image must be square
The image cannot be larger than 1024x1024
Bigger is not necessarily better. If you intend to use the shape at a small brush size, keep the shape image smaller as well.
Leave some clear space around the edges of the image.
The image can either be greyscale, or a PNG with a transparent background
A black and white image will apply transparency where it is black, and white will be the stamp. So if your image is drawn with black on a white background, you will need to reverse it before importing it as your brush shape. Be sure to convert your layer(s) to greyscale before finishing.
You can force the brush to always use the color of the imported image by turning on “With Color”. This would be used if you are importing a color image with a transparent background (our leaf brush set is an example of this)
TIFF Template
To help with creating shapes, we’ve created this TIFF file that you can use to compose your brush shape.
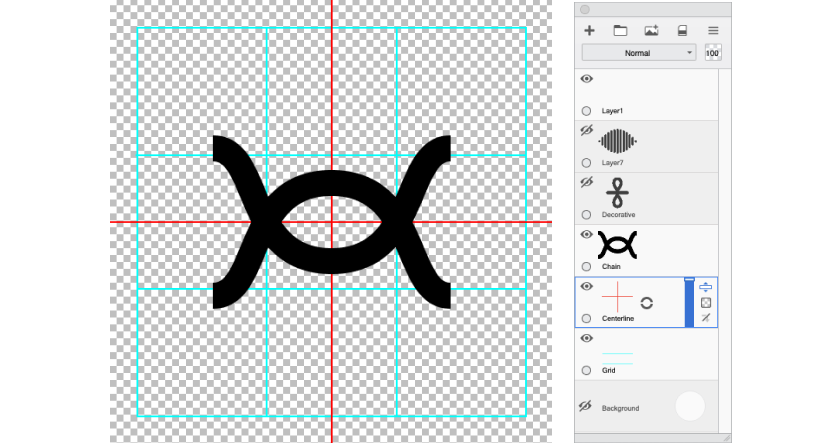
Canvas size is 512x512, an optimal size for a brush shape.
Includes a grid with safe area and center lines to help you compose.
Includes 3 sample layers of additional stitches.
Export your design as individual transparent PNGs and import to the brush shape.
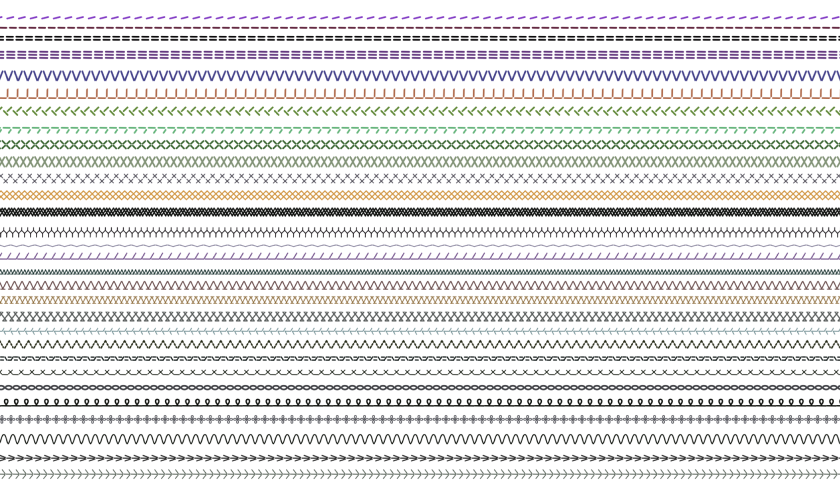
Stitches Brush Set
Here is the download for a set of 30 stitch brushes that we created.
Use them as a starting point and further customize them to suit your needs.
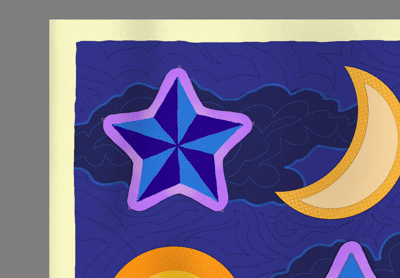
Feel free to download our sample QUILT TIFF to experiment on.
Try stitching with these tools:
Steady Stroke for more control on stitch placement.
Radial Symmetry to match shapes or create patterns.
Free Symmetry to mirror stitching at any angle.
Have fun!